Hello there, Asia King here. Welcome to another crafty week and this week we’re having a fabulous blog hop with Clearsnap®.
With today’s project I am hoping to get into a festive mood and finally kick off my Christmas cards production. Have you started yours yet? 🙂
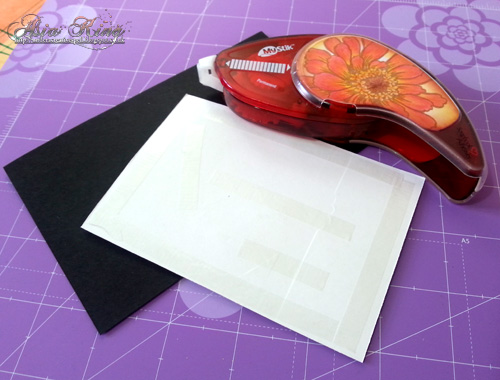
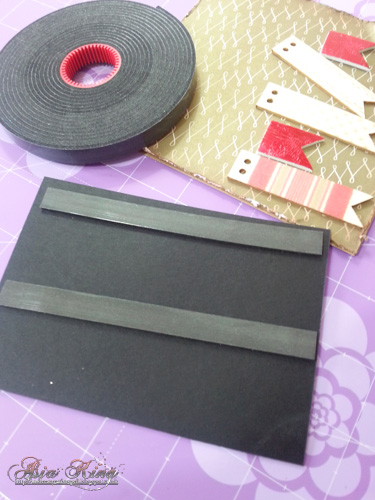
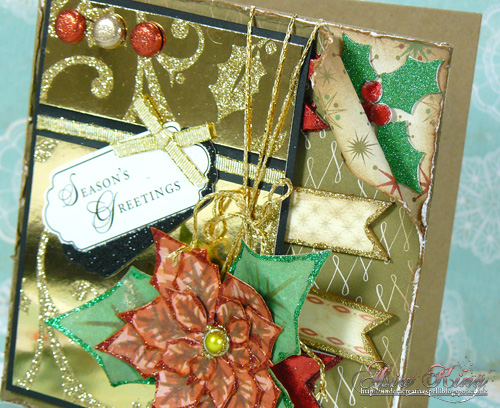
1. Mat your main decorative panel onto a black card and adhere with MyStik™ Permanent Strips Dispenser. My decorative panel was saved from one of the last year’s cards. And did you know that you can personalise your MyStik dispensers? Have a look at my post here to see how I decorated mine ;).
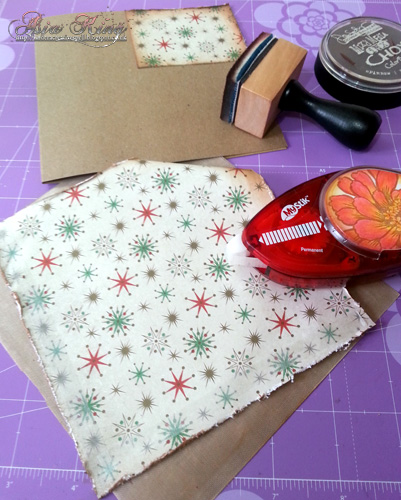
2. Cut a panel as big as your card blank and a smaller one. Distress your chosen papers from BasicGrey 25th & Pine collection using a Sparrow Mix’d Media Inx® Chox Inkpad and a blending tool.
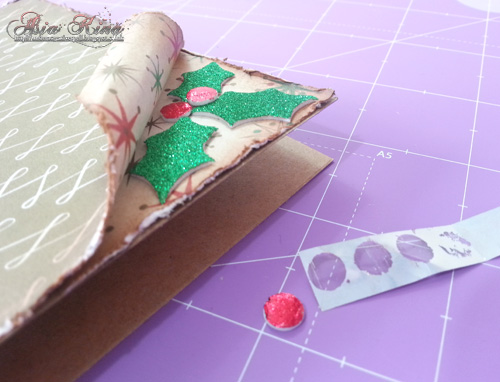
3. Roll one of the corners on the large panel. Adhere your papers onto your card blank with MyStik dispenser.
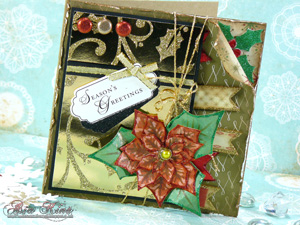
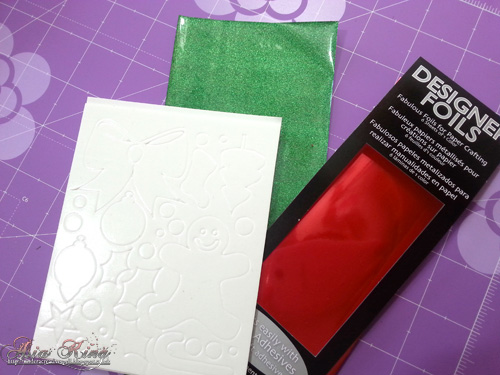
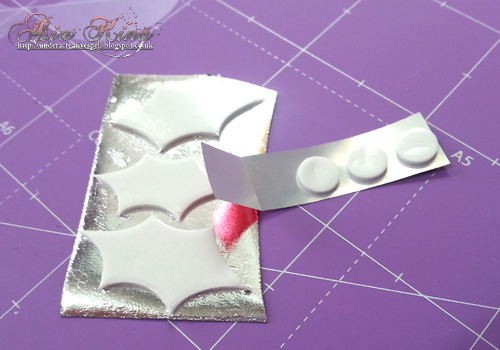
4. Peel of the holy leaves and berries from the 3D Foam Christmas Shapes sheet and cover with Zoom Mess Free Glitter sheets and Clearsnap Chery Pie Designer Foils.
5. Add the holy cluster to the top right corner of the card.
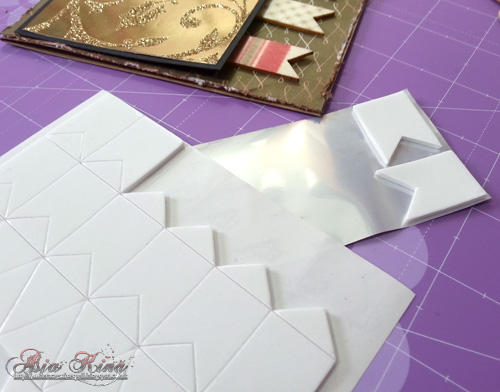
6. Cover a couple of 3D Foam Pennants with the Cherry Pie foil.
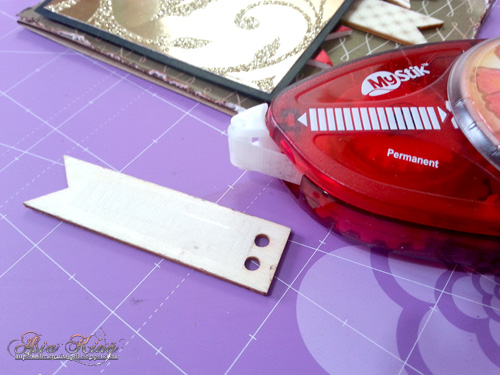
7. Run the MyStik over the wooden banner shapes from the 25th & Pine collection and adhere along the right edge of the card together with the foil pennants.
8. Add Crafty Foam Tape to the back of the decorative panel. Adhere to the card.
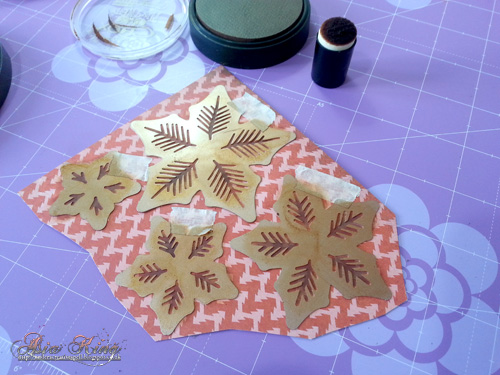
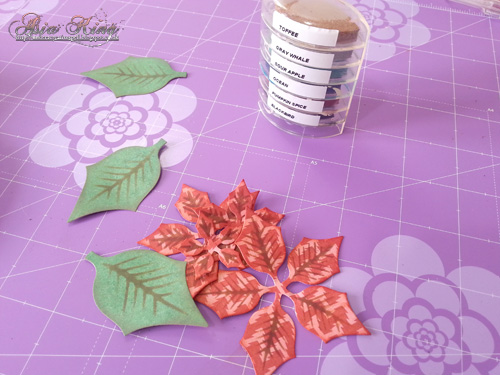
9. Die cut a poinsettia flower from the patterned papers using Spellbinders Layered Poinsettia die set. Sponge some Sparrow ink through the die/stencil.
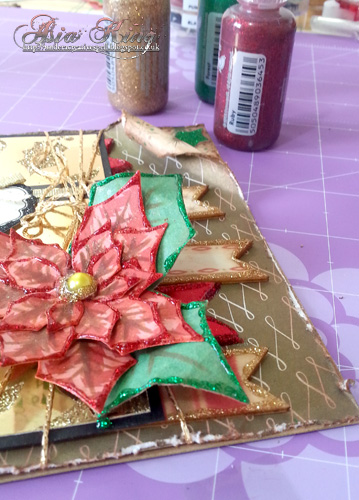
10. Distress the edges with ColorBox® Queties inks. Stack the layers with DODZ Adhesive Dots Small. Adhere the flower and leaves to the card with DODZ Adhesive Dots 3D.
11. Add glue glitter to the flower and the banner elements.
I hope you enjoyed this little tutorial :).
Now, would you like to get yourself an early Christmas pressie? If the answer is ‘yes’, then make sure to comment on each post this week for a chance to win a prize package of Scrapbook Adhesive by 3L® products. Then visit Clearsnap’s blog for even more inspiration!
- MyStik Permanent Strips
- 3D Foam Pennants
- 3D Foam Christmas Mix
- Crafty Foam Tape Black
- Dodz Adhesive Dots Small
- Dodz Adhesive Dots 3D

By Ros Crawford October 28, 2013 - 7:13 am
Wonderful card Asia … What terrific goods too! … Love the foam banners and Christmas shapes!
By Sue D October 28, 2013 - 7:32 am
Very pretty–I like all the shine and sparkle.
By marylouh October 28, 2013 - 9:04 am
Love the foam that you can color as you wish. That’s on my list of “buy now”.
Great card. Have to start the Christmas cards soon.
By Dorina D October 28, 2013 - 10:05 am
Exquisite and beautiful. Great tutorial showing how to use the adhesive with foils and glitters. Love the new shapes in the foams.
By Deborah October 28, 2013 - 11:02 am
Wow you started with a bang elegant card and I like all the different mediums you used lovely card TFS
By Barbara Staradumsky October 28, 2013 - 11:22 am
I just adore those foam Christmas Shapes! Amazing what you can do with those! so so cool!
By Carla Hundley October 28, 2013 - 2:13 pm
Wonderful card.
Love all the details
in it.
Carla from Utah
By Amante del Papel October 28, 2013 - 2:20 pm
Beautiful card, all details are incredibles, thanks for this fantastic tutorial!
By kath White October 28, 2013 - 2:43 pm
Wow, gorgeous card. You can tell a lot of work went into it’s creation.
By jpscraps October 28, 2013 - 2:46 pm
The card is gorgeous with all the sparkle and shine!!
By Sharon October 28, 2013 - 3:01 pm
would love to win, this card is beautiful.
By Carolyn J October 28, 2013 - 7:22 pm
Such a fabulous card! And it looks easy to make.
By Yolanda October 28, 2013 - 7:24 pm
love your card!thank you for the tutorial.
By Robin B. October 28, 2013 - 8:34 pm
What a pretty card! I love what you did with the poinsettia. Thanks for sharing.
By Jean Bullock October 28, 2013 - 9:41 pm
Love it. Thanks for the great tutorial!
By Iris Soscia October 28, 2013 - 11:49 pm
Beautiful card – love all the layering.
isoscia at aol dot com
By pat wilkinson October 29, 2013 - 2:27 am
gorgeous card great embellishments. Love how you’ve altered them. xx
By Janis in ID October 29, 2013 - 3:37 am
Love the gorgeous card. That rolled edge is spectacular!!
<3 J
jwoolbright at gmail dot com
By michalika October 29, 2013 - 3:45 am
Wonderful card. Love all the details in it. thanks for this fantastic tutorial!
By Miriam Prantner October 29, 2013 - 10:09 am
Gorgeous card! Love all that sparkle and shine!
By Julie A. Shearer October 29, 2013 - 10:17 am
Absolutely beautiful card ! I love these adhesives . TFS .
By Katie B. October 29, 2013 - 3:08 pm
Beautiful, love the holly peeking out from behind the paper! Great job. Thanks for sharing.
Katie B.
By Kathy Strawson October 30, 2013 - 2:29 pm
I think there is a whole wish list of designer foils and adhesives to mark down at my favourite scrapping store…Urban Scrapbook
By Marsha D October 30, 2013 - 4:57 pm
So pretty. Like how each leave and petal are edged with glitter.
By Loly Borda October 30, 2013 - 5:19 pm
Beautiful card! Love the poinsettia! TFS
By Mary S. October 30, 2013 - 5:19 pm
Pretty card….I like the foam shapes.
By Sylvia Nelson October 30, 2013 - 10:09 pm
What a lovely card, Asia, I really love the foils! That foam tape looks like it would be so easy to use. Thanks for your sample using all of these products.
By Corrine Ann October 31, 2013 - 2:30 pm
Beautiful card! I am really getting to like all these foils.
By Ann October 31, 2013 - 4:41 pm
Very attractive card. I’ll have to try those foils.
By Judy October 31, 2013 - 6:12 pm
Very inspirational
By Anna Violette October 31, 2013 - 6:45 pm
I LIKE THE POINSETTIA IDEA.. SIMPLE BUT EYECATCHING. ……gonna steal it.. hehe
By Jean Bullock October 31, 2013 - 7:44 pm
Wonderful ideas! Thanks for the great tutorial.
By snazzy jj November 1, 2013 - 11:45 am
Glittery and love the layers. Haven’t tried Dodz nor foam shapes yet, but being a 3L groupie the are now on the list.